Process Builder
Process Builder is a next-generation business process automation tool. It helps to automate the business processes by providing a powerful and user-friendly visual representation of your process like a flow chart.
We can use the process builder to perform all of the actions what we can achieve by using workflow (like: Assigning a task, Email alert, Field Update) except outbound message.
Actions supported by Process:
- Apex
- Create a record
- Email Alerts
- Flows
- Post to chatter
- Quick actions
- Submit for approval
- Update records
To create a process builder we need to set:
- Select object, on which the process will execute
- Define the criteria/Rule
- Choose what action want to execute if criteria meets otherwise what other action need to execute
- Activate the process
How to create Process using process builder?
- Go to Setup-Create workflow & Approvals -Process builder.
- Click on the process builder.
After clicking in the process builder, we will navigate to the process builder page where we can see all list of process or introduction page if you don’t have any defined process as below screen shot.
To create a new process, click on the new button. After clicking new button we will enter the details/Properties of the process as per below screen shot.
After entering all properties/Details please click on save button.
Now it will redirect to the process builder page where we can select the object on which we are defining the process, we can specify criteria, based on which the action will execute. We can add what type of action to execute in part of this process.
Here in top we have Button bar, which having different type of buttons as View All Process, Clone, Edit Properties, Expand All, Collapse All, Activate
The middle region is called as canvas, which consists of Add object, Add criteria, adding of actions.
Add Object
Now let’s add the object for which we are creating the process i.e. Account
Now click on Add Object node in the process builder canvas as below screen shot
After clicking on the Add Object, in the right hand side of canvas, layout will be visible to add the properties as below screen shot
Here you can type the Name of object or you can select from drop down.
Here we can select the object for which we are creating this process, and select the option when this process is going to start.
We can set the process to start only when a record is created or when a record is created or edited.
Also we can set, the process to evaluate a record multiple times in a single transaction as per the below screen shot. If we set the process to evaluate the record multiple times in a single transaction then this process can evaluate the same record up to five times in a single transaction. It will re-evaluate record, if any process or workflow or flow updated the record in same transaction.
After all selection click on save.
Add Criteria:
Click on Add criteria for adding new Criteria for executing process actions
Define the criteria, based on which action group will be executed.
When criteria are met, the process executes the associated action group. When criteria are not met, the process skips the action group and evaluates the criteria for the next action group.
After clicking on the Add criteria, in the right side of the process builder canvas we can enter the criteria as per below screen shot.
Here I can select the criteria as a filter condition or Formula evaluates to true or no criteria.
We can’t execute any workflow without having a rule entry, but in process we can execute an action without having a criteria i.e. 3rd option as No Criteria – just execute the actions!
 After selecting Criteria as Filter conditions are met we will get the options to add the filter condition as below
Now to add the filter , add the condition by clicking on the Field drop down which will take you to select any field from the objects
Select the field as Number of locations and click on save button.
After click on save button, we can see the below filter criteria as per screen shot.
We can add multiple condition with ‘And’ or ‘OR’ or ‘we can customize the logic’.
Also we can set, the actions are executed only if the record meets the criteria now but the values that the record had immediately before it was saved didn't meet criteria. This means that these actions won't be executed when irrelevant changes are made by setting the checkbox for “Do you want to execute the actions only when specified changes are made to the record?”
Now click on save button.
As we have selected the option “Do you want to execute the actions only when specified changes are made to the record?” as yes, we can able to add “Scheduled Actions” in the process.
Add Actions to Process
After we have set the criteria, define the actions that will execute when the criteria are met.
We can add maximum 10 immediate actions and 10 scheduled actions to a given criteria.
An action group consists of immediate and scheduled actions.
Immediate actions are executed once evaluation criteria are met. Scheduled actions are executed at a specified time.
In a process we can add following type of actions:
1. Apex
2. Create a record
3. Email Alerts
4. Flows
5. Post to chatter
6. Quick actions
7. Submit for approval
8. Update records
Let’s use “Create A record” Action
We can create a record by manually entering values or by using the values of related records.
Now click on Add Action of immediate action block as per below screen shot.
After clicking in Add action , in right hand side of process builder canvas we can define the action as per the below screen shot.

Here select the action as Create a record. Once we select the action as create a record we will prompt to provide the details of the action as per below screen shot.
Here enter the action name and select on which object you want to create a record. Once you populate the object name then you need to enter the field value for that object as per the below screen shot. Here the field value you can enter manually or you can enter as per the related records.
To enter field value manually you can directly type the field values.
If you want the value should come from the related records, click on the pencil symbol, after clicking, the field will display as per below screen shot.
Now click on the drop down which will display you the list of related object fields as per the below screen shot.
Here select the field name to populate the value to the new creating records.
After entering the field values for new records please click on save button.
Now successfully we have added one action for creating a record, which we can see under the action group as per below
Add another action “Update records”
Update one or more records that are related to the record that started the process by manually entering values or by using the values from related records.
Click on “Add action” on the action group, as per the below screen shot.
 Then enter the details for the updating record. We update the same record or its related record in this process. If we want to update related record then select the object as the related object name.
Now click on save to create this action.
Add action “Email alerts”
Click on add action in action group add a new action in the group. Let’s add a new action as “Email alerts”. Here we will send the email alert when we are creating account, based on our previous action contact will be created and then we will send an email to notify that a contact created for the account with details. We will add existing email alert to this action as below screen shot.
Select the action type as email alerts, then enter action name and select the existing email alert to use. Click on save.
Add action “Submit for approval”
Only the record that started the process will be submitted. You cannot submit any related records for approval.
For Approval Process, indicate whether you need to submit the record through the “default approval process” or through a “specific approval process”
The process fails if:
• The record is submitted to the default approval process, and there are no active approval processes for the record’s object type.
• The record is submitted to the default approval process, and it doesn’t meet the criteria for any of the approval processes for the record’s object type.
• The record is submitted to a specific approval process, and it doesn’t meet the entry criteria.
You can select the submitter as “Current user”, “user field from the record” or “other user”.
You can add submission comments for the approval process also.
Add Action “Post to chatter”
This action is available only if your organization has chatter enabled.
We can Post to the feed of a user by identifying a specific user in your organization or a User lookup field on a record.
We can post to the feed of a specific chatter group.
We can post to the feed of the record that started the process.
Post to a user’s chatter feed
Click on Add action in action group, and then select the action type as “post to chatter”.
Then enter the action name. Then select post to as “User”. The user we can select from all available users or we can select the user from the record.
When we select a user from a record, we have to select a field that contains a user’s id.
Fill out the message that you want to post. Use the fields above the text box to mention a user or group, add a topic, or insert a merge field into the message.
The message can contain up to 5,000 characters.
Click on save to add this action to the action group
Post to a Chatter group
In the “Post to” field, select Chatter Group. For Group, search for the Chatter group whose feed you want to post to.
Fill out the message that you want to post. Use the fields above the text box to mention a user or group, add a topic, or insert a merge field into the message.
The message can contain up to 5,000 characters.
Click on save to add this action in action group.
Post to a Record’s Chatter Feed
You can post to the record’s Chatter feed only if feed tracking is enabled for the object that the process is associated with.
Click on save to add this action to action group.
Add action “Quick Action”
We can execute quick actions as global action or object specific actions.
Here click on Add action in the action group and then select the action type as Quick action.
Then enter the action name and then filter to specify kind of action we want to use.
You can select as
- Global action
- All global actions in our organization. then filter even further by selecting the Type of actions that you need to search through.
- Object
All object-specific actions in your organization that are associated with a certain Object Name . Global actions can’t be filtered by object.
-type
All object-specific and global actions in your organization based on the type, such as Create a Record or Log a call.
Click on save and add this action to action group.
Add Action Type “Apex”
Click on Add action in action group and select the action type as “Apex”.
We can only use the apex class which having invocable method.
We have created one apex class with invocable method as below:
Now select the action type as Apex in process builder and enter this class name as apex class to execute.
As this class method expects one parameter “ids”, we can pass the value of this parameter from the process as below screen shot.
Click on save button to add this action to the action group and process.
Add Action “Flow”
Launch a flow from your process to automate complex business processes. Create flows to perform logic and have events trigger the flows via processes without writing code.
We can add only “Autolaunched Flow” and active flow in this flow action.
We have created a flow to create opportunity when account is created as per the below screen shot. We have created a variable Accountid and Opportunityname which we will set from process and based on the input new opportunity will be created.
Here select action type as flow, and select the autolaunched active flow in the flow selection drop down box. Now set variable for flow in the set flow variable region. And click on the save to add this flow action to the action group.
We have added all type of actions in the process as immediate action.
We have the options to add Schedule action also which will execute based on the specified time.
Lets add one schedule action for sending email after 2 days of creating account.
To set the schedule action, first we need to have scheduler which means we need to get a specifid time when my process action going to execute.
First add a schedule by clicking on “set Schedule” as per below screen shot.
After clicking on set schedule we will get the option to add the time for executing our process action as per the below screen shot.
We can set the time to execute the action from now or after some specified date field value of the flow initiating record.
Here we have added 2 days after the account creation date as per below screen shot.
Now we have added the action as sending email after 2 days as per below screen shot.
All the actions we have added will execute when our criteria is true, if we want to execute actions when our criteria is false then we can configure same steps based on our requirement in the false condition of our criteria.
Now assume we are ready with our process with all appropriate actions.Now we need to activate this process by clicking on the Activate button as per the below screen shot.
When we are activating we will get one warning as per below screen shot, telling about creating the version if we have same active process.
When we activated the process, whole process will be in read-only mode and if you want modify anything in process then you need to create a new version of it.
If you want to clone the process then you can click on clone button and there you can create a new version or a new process as you want.
We can click on the back to set up to go to the setup menu of salesforce.
If you want to modify the properties of the process like name or description, click on the edit properties.
If you want to see all the process available in org, click on the view all process button.
If you want to deactivate the process, you can click on the deactivate button.
All setup for process creation using process builder completed. Now we will verify all these actions are executing or not.
Lets create an account with Number of location as 5(greter than 3) so our all actions will execute.
Creating account with below inputs
Output of process builder:
Action 1: Create a contact
Action2: Update Account rating field
We have created account with rating as cold, but process field update action changes it to Warm,
Action 3: Send Contact creation email
Action 4:Approval process
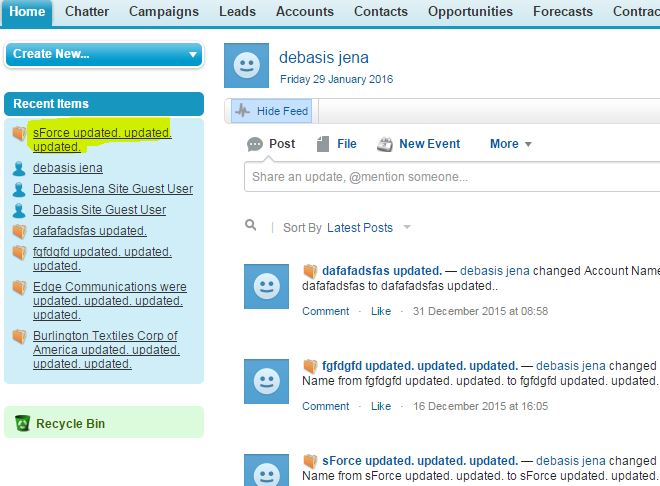
Action 5: Chatter post
Action 6: Quick action: create note (using global action)
Apex: create note using apex code
Action7: Flow
Create opportunity
Notes: requirements implemented not as per the business purpose, everything implemented as per the learning purpose only.